Sunday, April 10, 2022

My Bread Recipe

I have been making wheat bread in my Bosch for about 4 years. I love the recipe the I have and have tried others...always returning to this recipe. I got it from my friend Gina from Utah. It is really delicious and stays fresh for a long time. It makes 5 loaves and usually my family eats 2 as soon as it is done. I grind the wheat fresh in my wheat grinder and I use white wheat. I have used whole wheat flour from the store and it works just as well. Try it!
Whole Wheat Bread
Put 5 c. warm water in the Bosch. Add 3 T. SAF yeast and 1/3 c. molasses and 1/3 c. honey and mix it up. (You can use all honey or all molasses, if you prefer). Let is sit for 5 minutes to get the yeast going.
Add 5 c. wheat flour, 2/3 c. oil, and 1 1/2 c. rolled oats(old-fashioned). Mix well and let this mixture "sponge" for about 20-25 minutes. That means let is rise in the bowl of the mixer. It makes the bread lighter.
After it has "sponged" Add 1 T. salt and 2 T. Dough enhancer. Mix.
Begin adding wheat flour and bread flour 1 cup at a time...stopping between additions until the dough cleans the side of the bowl. It is usually 1/3 bread flour to 2/3 wheat flour.
You can make this 100% whole wheat if you prefer...we like it a little bit lighter.
Knead in the Bosch for about 8-10 minutes. Turn out the dough and divide into 5 loaves;
each weighing (yes, I weigh the loaves) about 22.5 ounces.
Shape them and put them in the greased pans, cover with plastic wrap and turn on the oven to 350 degrees. Let them rise until double; about 30 minutes and bake for 30 minutes.
So good and so good for you!
You can make hamburger buns, rolls, cinnamon rolls, whatever, with this basic dough!

You can also mix 1/2 whole wheat and 1/2 white flour.  It's a good way to transition your family into eating 100% whole wheat if that is your goal.  

Saturday, March 4, 2017

White Bread "Perfected".

I am a white bread snob.  Growing up, we ate Wonder Bread. Soft, delicious, fluffy goodness.  We didn't eat the "store" brand. Gross.
There were many attempts to make a copycat version of the best bread....to no avail.  I've tried a zillion (okay, a lot) recipes and none of them has lived up to the real deal...until today!

I found a recipe somewhere and have been messing with it for awhile. I use SAF Instant Yeast and love the results I get. I alos use the sponge method to get even better results. What does that mean?  Sponging is mixing your liquid, sweetener, yeast, and flour together to rise for about 30 minutes before you add the rest of the flour. Better taste, better texture, better bread. Today was my second test run to make sure it was "worthy" of it's title.  It totally is. Soft, fluffy, even crumb, beautiful crust. Perfection. It stays soft for about 5 days...if it lasts that long!
 I make it in my Bosch so the recipe makes 4 loaves.
You could cut the recipe  in half and make it in your Kitchen Aid....but if you are really wanting to make bread for your family, save your pennies and buy a Bosch!  Best machine I've ever had.  
I give you,
White Bread Perfected

You will need:
4 c. warm water
3/4 c. sugar
3 T. SAF Instant Yeast
Place these ingredients in your mixer and mix them up.  Let them sit for a few minutes to proof. Technically, you don't need to do this and could mix the flour in now but old habits die hard with me.

When the yeast mixture is bubbly, add:
 4 cups of  bread flour
 Mix until a batter is formed.  It should look like pancake batter.  Cover and let the mixture rest for about 30 minutes. This is the "sponge" method I talked about.  After the 30 minutes, your batter will have risen a lot....like double to triple in volume.  Don't freak out....just turn on your mixer and deflate it.
Now next step.
Add:
 1/2 cup oil. I use vegetable oil, melted coconut oil. Whatever.
1 T. salt
Enough flour to make a nice soft, dough; around 5-6 cups.
Start mixing the flour in 1 cup at a time until your dough starts to clean the side of the bowl.
When that happens, knead the dough for 5 minutes.  I do this on Speed 2 in the Bosch.
The dough will be soft, but not sticky after kneading.
Turn out onto a greased counter top and divide into 4 loaves. I never turn my bread out onto a floured surface....it makes it dry and tough.
Let the loaves rise until double and bake in a 350 degree oven for 30-35 minutes.

You can also use this dough for  fantastic cinnamon rolls, dinner rolls, hamburger buns, etc.

Wednesday, January 25, 2017

Electric Pressure Cooker Fantasticness!


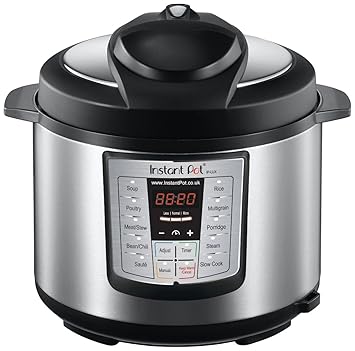
I have had about 3 Electric Pressure cookers in the past 5 or 6 years.  I love mine and I use it ALL the time.  My newest favorite is the Instant Pot.  It is a multiple use appliance that allows you to make yogurt, slow cook, and pressure cook.  Here are a few tips for using your EPC and some recipes that are just plain good!
Image result for Instant Pot
Using your Electric Pressure Cooker
1.     Read your instruction manual!  There are lots of EPC’s and there may be different requirements for use.
2.     Follow all safety guidelines. Always check that your vent is clear. Always add oil or butter to starchy foods.
3.     Always put at least 1 cup of liquid in your EPC.
4.     Never overfill your EPC.
5.     Don’t leave your EPC unattended…i.e. don’t go out of the house to the store.
6.     DO NOT CAN in your EPC…even if the instructions say it’s okay!
7.     Practice, Practice, Practice using your EPC! 
EPC uses high/low pressure to cook your food faster.  They are 100% safe when used correctly. 


PC Mac and Cheese

1 pound pasta
4 c. water
2 T. butter
1 t. salt
Cook on high pressure for 4 minutes. Use Quick Release (QR) . When pressure is all gone add :
1 12 oz. can evaporated milk
2 c. shredded sharp cheddar
2 c. shredded Monterey Jack
Mix until melted. Let sit for about 5 minutes to thicken and serve.
You can use whatever cheese your family loves.


Chicken Taco Meat
Chicken breasts or thighs
1 cup salsa
½ cup water
½ pkg. taco seasoning  or your own taco spices
Cook on high pressure for 25 minutes….35 minutes if using frozen chicken. Use NPR (natural pressure release). When pressure is gone there will be lots of liquid in the PC. Drain out most of the liquid.  Shred the chicken with 2 forks. Add the rest of the taco seasoning, more salsa if desired, and serve.

Mexican Beans
3 cups soaked pinto beans. You can use un-soaked beans..it just takes longer.
6 c. water
2 or 3 dried chilies. I use chili de arbol
2 bay leaves
¼ c. chicken broth powder. I use the Caldo from Knorr. It’s in the Mexican section.
1 T. garlic
Chopped cilantro, if desired.
Cook on high pressure for 45-50 minutes.  Use NPR. Adjust seasoning, take out the bay leaves and chilies.  Serve.

Hard-cooked Eggs Perfecto!
Put a rack in the EPC.  Place as many eggs in the PC as you desire.
Cook on high pressure for 8 minutes.  As soon as the time is up use the Quick Release. When pressure is gone, take eggs out and put into cold water.  Let sit for a few minutes and peel.  Perfecto infinity!  This works for my FRESH eggs!


Brown Rice
2 c. brown rice
2 ½ c. water
1 T. butter or oil
1 t. salt
Cook on high pressure for15 minutes. Use NPR.
Pulled Pork

Boneless country-style pork ribs
1 c. water
Garlic
Salt
Pepper
½ cup BBQ sauce

Cook on high pressure for about 40 minutes.  Drain excess liquid and shred the meat.  Add your favorite BBQ sauce and eat on a bun.

Sunday, August 7, 2016

Wedding Special Sauce~BBQ deliciousness.

I am a lucky Mom.  Two of my three boys are getting married this summer. Shane and Lynsey were married just yesterday in the family barn that my husband has been preparing for a few months.  Ryan and Sydney will be married in September in Utah. Better still is the fact that I get two girls in the deal as well as 2 puppies.
 When Shane and Lynsey got engaged, the boy asked me to make pulled pork sliders, deviled eggs, potato salad and baked beans.  I said " Sure, No problemo!  What the heck was I thinking?  We paired it down to the sliders and called it good.  And good it was!  I cooked  70 pounds of pork the week before the wedding and threw it in the freezer.  What a time-saver and lifesaver!  I still have a half-gallon of the Special Sauce in the freezer for later! Yum.


 The thing that makes the slider is the sauce!  I have experimented with lots of sauces and have come up with a great tasting, tangy, sweet sauce based on a recipe I found here.  It is a fabulous starting point for customizing your sauce to make it your own....and that is exactly what I did.  To make it exactly what I wanted I added some yellow mustard, a little bit more brown sugar, and the secret ingredient......strained homemade boysenberry jam!  To die deliciousness!  


Try it...you'll love it!

Wedding Special Sauce
adapted from Mel's Kitchen Cafe
Makes about 7 cups.

  • 2 cups ketchup
  • 2 cups tomato sauce
  • 1 1/4 cups brown sugar
  • 1 1/4 cups red wine vinegar
  • 1/2 cup yellow mustard
  • 1/2 cup molasses
  • 3 T. butter
  • 4 t. hickory flavored liquid smoke
  • 1/2 t. onion powder
  • 1/2 t. garlic powder
  • 1/2 t. chili powder
  • 1 t. smoked paprika
  • 1/2 t. celery seed
  • 1/4 t. cinnamon
  • 1/4 t. cayenne pepper
  • 1 1/2 t salt
  • 1/2 t. black pepper
1/2-3/4 cup strained boysenberry or blackberry jam. (Straining gets the seeds out.)

In a large saucepan, mix together the liquid ingredients. Add the spices. Mix well over medium heat. Bring to a boil, reduce heat and simmer for 30 minutes. Stir it every once in a while....it will stick to the bottom if you aren't careful.  The sauce thickens as it cools.
When cooled, the sauce can be frozen. Thaw in the refrigerator and use as needed.

Delicioso.  You can use apricot jam, orange marmalade, raspberry or marionberry jam, or anything else that suits your fancy to make it different. You can also adjust the spices to your own taste as well.

Tuesday, July 5, 2016

Mango Freezer Jam! Updated!


I became a Master Food Preserver through Washington State University Extension 6 years ago!  What a fantastic journey! The MFP Program is a great course for anyone that wants to help others learn about preserving foods and to learn current, safe information about canning, freezing, drying, pressure canning, food safety, etc. We did hands-on learning each week about the area we were focusing on. When I finished I was so excited to be qualified to teach about what I had learned and have continued to learn! Anyway...I digress! This was a favorite lesson. We learned all about Jams and Jellies; banana jam, apple pie jam, and my new favorite, Mango Freezer Jam! It is heavenly! You must try it NOW!  Yum!

Check with your local Extension office to see if the Master Food Preserver program is offered in your area. It is a great way to connect and serve your community while making friends along the way.


Mango Freezer Jam


3 c. mango pulp-mashed....it took about 4 good-sized mangoes


1/4 c. lemon or lime juice-the bottled kind. I used lemon...but next time I will use lime.


5 c. sugar


3/4 c. water


1 pkg. regular pectin-not low-sugar or "freezer jam" pectin. I used MCP.


Put the pulp in a bowl with the lemon juice and sugar. Stir well. Let sit for 10 minutes.


Put the pectin and water in a saucepan and bring it to a boil. Boil for 1 minute. Pour over the mango mixture after the ten minutes has passed. Stir for 3 minutes or so until the sugar is dissolved.


Pour into half-pint freezer containers, leaving 1/2 inch headspace. Makes 7 half-pints.


Place in freezer. GO and LICK OUT THE BOWL! YUM!

Mango Freezer Jam! Updated!


I became a Master Food Preserver through Washington State University Extension 6 years ago!  What a fantastic journey! The MFP Program is a great course for anyone that wants to help others learn about preserving foods and to learn current, safe information about canning, freezing, drying, pressure canning, food safety, etc. We did hands-on learning each week about the area we were focusing on. When I finished I was so excited to be qualified to teach about what I had learned and have continued to learn! 
 This was a favorite lesson. We learned all about Jams and Jellies; strawberry jam, apple pie jam, and my new favorite, Mango Freezer Jam! It is heavenly! You must try it NOW!  Yum!

Check with your local Extension office to see if the Master Food Preserver program is offered in your area. It is a great way to connect and serve your community while making friends along the way.


Mango Freezer Jam


3 c. mango pulp-mashed....it took about 4 good-sized mangoes


1/4 c. lemon or lime juice-the bottled kind. I used lemon...but next time I will use lime.


5 c. sugar


3/4 c. water


1 pkg. regular pectin-not low-sugar or "freezer jam" pectin. I used MCP.


Put the pulp in a bowl with the lemon juice and sugar. Stir well. Let sit for 10 minutes.


Put the pectin and water in a saucepan and bring it to a boil. Boil for 1 minute. Pour over the mango mixture after the ten minutes has passed. Stir for 3 minutes or so until the sugar is dissolved.


Pour into half-pint freezer containers, leaving 1/2 inch headspace. Makes 7 half-pints.


Place in freezer. GO and LICK OUT THE BOWL! YUM!

Saturday, July 2, 2016

Fresh Apricot Pie

Nothing says summer more than fresh local fruit!  I consider myself blessed to live in the Pacific Northwest with it's bounty of fresh fruits and vegetables.   Apricots are a summer treat and putting them in a pie is a family tradition I intend to keep and pass on to my two new daughters-in-law that are joining our family this summer!

 My Mom taught me how to make this pie....without a formal recipe. We used the recipe from the old Betty Crocker cookbook for the pie crust .  I am a good pie crust maker but.....I have started to use the Trader Joe's Pie Crust.  Simple to use and it's a darn good crust. Perfect to have in my freezer.  
The apricots are firm, ripe fruits that I pit and quarter.  I add sugar, flour, a pinch of salt, and I tried a new addition of Penzey's Pie Spice.  Wow!  The Pie Spice is a combination of cinnamon, vanilla sugar, mace, ginger, nutmeg, anise, and clove.   Fantastic flavor.  I hope you'll give it a try and see exactly why I love this pie!


Summer Apricot Pie

4-5 cups fresh apricots, pitted and quartered
1 1/2 - 2 cups of sugar~depending on the tartness of the apricots.
1/3 cup flour
2 t. Penzey's Pie Spice or cinnamon 
1/2 t. salt
Mix filling well in a large bowl and let it sit for about 15 minutes to make some juice. 
After 15 minutes, pour filling into a 9-inch pastry lined pie pan.  Dot with butter, about  2 tablespoons. Add the top crust. Crimp the edge and vent the top of the pie. Brush with milk and sprinkle with coarse sugar.

Bake at 400 degrees for 15 minutes. Reduce heat to 325 degrees and continue to bake for 30-35 minutes until you see juice bubbling out the top.


Monday, April 4, 2016

Fried Chicken~My way!


I love fried chicken.  I ONLY love it the day it's made....not.cold.  I know I am weird.  We grew up eating fried chicken a lot.  It was crispy and crunchy...made in a cast iron frying pan and NOT finished in the oven. My Mom made it the way my Grandma made it.  I make it the same way~the right way!  My Dad would always fry up the heart and gizzards.  Delicious.  Some days I throw a batch of gizzards on to fry just for me. MMMMM.  Many days I fry up a bunch of legs....tonight is one of those days!  Good fried chicken takes time.  Don't rush it....it will be worth it!

Buttermilk Fried Chicken

1 cut-up fryer or chicken pieces of your choice, i.e. legs, thighs, etc.
2 c. buttermilk
1 T. salt
Pepper to taste
Coating
4 c. flour
salt and pepper to taste
Oil to fry

Place the chicken in a large bowl and add the salt and pepper. Mix it around so it coats the chicken pieces.  Pour the buttermilk over the chicken and let it sit for about an hour.  This tenderizes the chicken and gives it great flavor.
Mix the flour, salt and pepper in a bowl. You can get creative here; some people add cornmeal to their flour for crunch.  You can also add spices or even cayenne to give it some zip.  
After the chicken has marinated in the buttermilk, coat each piece in the flour mixture.   
Heat the oil in your skillet till it's hot. Add the chicken pieces and fry until golden brown or until the internal temperature of the chicken is 165 degrees.  Watch it so it doesn't burn....like I just did!

My Grandma served her fried chicken with mashed potatoes and milk gravy, fried okra, sliced tomatoes, bread and butter.

Finger-lickin' good!


Wednesday, December 23, 2015

Oatmeal Thumbprint Cookies~A Christmas Tradition


When I was growing up Christmas was a much awaited holiday.  Santa always brought toys, and socks, and an orange in our stockings.  We were allowed to open one present on Christmas Eve and it was always pajamas!  My Mom made Chocolate Butter Fudge; a recipe I have only made successfully one time!  It is the best and I am going to try it once again this year.  She also made these delicious oatmeal shortbread thumbprint cookies...with yummy mint frosting tinted pale pink and mint green.  It can't be Christmas without them.


Oatmeal Thumbprint Cookies

1 cup butter, softened
1/2 cup powdered sugar
2 T. vanilla
Cream this together until fluffy.

Add:
2 cups flour
1/2 t. salt
1 c. old-fashioned rolled oats

Mix well and rolls into small balls, about the size of a walnut. Press your thumb into the center. Bake in a preheated 325 degree oven for 20 minutes.

Mint Frosting

3 T. butter, softened
2 C. powdered sugar
4 T.  heavy cream
1/8 t. mint extract

1/4 t. vanilla
Red or green food coloring

Mix all butter, powdered sugar, and cream together till well mixed. Add the mint extract....it should be very subtle and the vanilla. Tint the frosting very PALE pink or green.


Tuesday, December 8, 2015

Chewy Granola Bars~A Family Favorite !

I LIKE granola.  Crunchy and yummy!  I LOVE granola BARS....crunchy and yummy. BUT....I ADORE these Chewy Granola Bars. I totally thought I had posted this recipe....ages ago.

   I can't remember where I got the recipe for these. They are easy to make, no-bake, real food...ok except for the rice crispies,  full of oatmeal goodness.  They even have a little bit of chocolate on top.  You can also add-in any favorite you have like raisins, craisins, nuts, peanut butter, more chocolate, dried fruit.


Chewy Granola Bars

2/3 c. brown sugar
1/2 c. honey
1 stick of butter
pinch of salt
1 t. vanilla
If you like peanut butter, add 2 T.  and melt with the rest of the ingredients.
Place in a saucepan and melt together everything but the vanilla. When it comes to a boil, let it go for 2 minutes. Add the vanilla off the heat.  Stir into the following ingredients that have been mixed in a big bowl.

4 c. rolled oats.....
I take out 2 cups and pulse it in the food processor until it is a little finer.  5 pulses. Add back to the bowl.
2 c. Rice Krispies
Any add-ins you like.
Mix and mix and mix until it is all coated with the honey mixture.

Pour into a greased half-sheet pan and spread evenly.  Take another 1/2 sheet pan and put it on top of the granola mixture and press firmly to compress the bars.  Sprinkle 1/4 c. mini chocolate chips on top and smash again.

Cool for at least 2 hours at room temp. or 15 minutes in the freezer. Cut into bars.
I wrap them in plastic wrap or put each bar in a snack-size ziploc. 
Makes 24 bars.


Monday, February 23, 2015

Cultured Butter Amazingness!


Mmmmm....there is nothing that tastes like freshly made butter. Is there anything better, you ask?  Well, yes...there is. Freshly made CULTURED butter. What is cultured butter?  

Cultured butter is made from heavy cream that has "cultures" added to it. Those cultures can be from yogurt, creme fraiche, buttermilk, or kefir grains. You add them to the cream and let it sit on your counter for 12-48 hours. The cultures add a delicious tang and depth of flavor to your butter.  It tastes so.good.

I used my Kefir grains to culture my cream. Kefir is a drinkable-style yogurt that contains friendly probiotic bacteria that are super good for your digestive system. It is made with milk.  The grains look like little pieces of cauliflower in the milk. I strain them out of each batch and re-use them for the next one. They last quite a long time.

To make the butter I used I quart of cream (NOT the ulra-pasteurized kind....raw cream can be used as well.) and my kefir grains. I put the cream in a quart-sized Mason jar and added my kefir grains. Put on the lid and give it a good shake. Let it sit on the counter till thick. I left mine out for about 24 hours.  Taste it to see how tangy it is and if you like it.  Mine was to my liking @ 24 hours. If you like it a little more tangy, leave it out a few more hours. No more than 36 hrs.

I then strained out my kefir grains and added the cream to my Kitchen-Aid mixer and whipped it until the butter separated from the buttermilk. It took about 5 minutes and it is MESSY! Have a large dish towel ready to cover your mixer....it splashes everywhere! Once it became butter, I drained off the buttermilk ( Save the buttermilk for baking or feeding the chickens...they love it!)and added some COLD water, about 1/4 cup to the mixing bowl and whipped the butter to expel all the buttermilk.  If you don't get all of it out, your butter will spoil faster.  I did this 3 times until the water was clear after mixing. Drain and then add salt to taste, or leave it out.  I added a good pinch to my butter.  Store in an airtight container. Use just as you would regular butter!

I paid $9.99 the other day for about 1/2 cup of cultured butter from Vermont! I will never do that again!  Try this easy, delicious butter!

Friday, August 15, 2014

Magic Berry Cobbler

Summer is waning, but the blackberries are going gangbusters around my house. WE love them in jam, syrup, on ice cream, in a milkshake, or in MAGIC BERRY COBBLER!  What makes it magic you ask?  It's the interesting way you put it together. My Grandma Kelin made cobbler with sweetened berries that she cooked first and then she covered it in pie dough, but always stuck the trimmed dough inside the fruit before topping it off with the dough. Delicious!  I have also had the poofy-biscuit like cobbler with the fruit underneath it...always seemed to have more biscuit than fruit.  This recipe is a perfect combo of fruit and biscuit-y goodness. The technique is the cool part, the MAGIC!  
Magic Berry Cobbler

In a mixing bowl add:
2 c. flour
1 c. sugar
1 t. salt
2 t. baking powder
1 t. fresh  grated lemon peel
Mix it up to combine and cut in till crumbly:
3 T. shortening
Add: 1 c. milk and mix together.
This is the magic part! Spread the batter in a 9x13 baking dish.
Combine 4 c. of berries with 2 c. sugar, the juice of 1/2 of a lemon, and a teeny pinch of salt.
Berries can be blueberries (smash them up a bit with the sugar) blackberries, raspberries, boysenberries, marionberries or any combination of berries. I even tried it with peaches once....not too bad!
Pour the berries over the batter in the 9x13 pan. 
Last step:  Pour over all...2 c. boiling water.
Bake in a 375 degree oven for 40-45 minutes .

Voila! Simple and delicious!

Serve warm with ice cream, whipped cream, or I have even topped it with lightly sweetened mascarpone cheese. Divine!

Friday, July 25, 2014

I Can...What's your Superpower?

I saw this on Facebook today and it made me smile!
I learned to can by watching my Mom make jam, can peaches, green beans, and pears.  When I got married  back in the 80's, I canned my first batches of jam and peaches.  As my family grew, I canned more peaches, pears~I really don't like pears, but one kid did~and branched out to pickles and salsa. One summer I went to a Canning 101 class put on by our local Extension Service. I learned lots of things.
A lot of things I had been doing....WRONG!  Oh dear!
After completing the class, I was able to take a course to become a Master Food Preserver through Washington State University.  What a feeling to complete the 8 week course and pass my test. Whew!  I was now able to give back to my community by teaching others HOW to can and preserve food safely and correctly!
The following part of my post is from the Pomona Universal Pectin website.  It tells what a Master Food Preserver does. I loved it.
Master Food Preservers Have a Mission – Teaching About Canning Safety
With the current explosion of interest in home food preservation – be it pickling, jamming, fermenting, or freezing – where are home preservers supposed to go for answers to their questions? Who out there has the most up-to-date understanding of food safety issues and approved practices?

Yes, you guessed it – your local Master Food Preserver (or MFP), trained by your local County Extension Office, and now a willing volunteer to answer your questions over the phone; teach classes; staff tables at Farmers’ Markets, County Fairs, and other such venues; and even make presentations to church groups and other organizations.

Never heard of a Master Food Preserver? Well, either had I until I started working with my sister Connie to bring you Pomona’s Pectin. So I decided to interview a few MFPs to find out who they are, how they got to be MFPs, what they do, and how you, if you’re interested, can follow in their footsteps.

I heard from MFPs in Washington, California, Idaho, Indiana, and Maine. Below is a summary of what I learned. For more detail about a particular state, click on that state. For information about states not included, search the internet, give a call to your County Extension Office, or go to their website.

What is an MFP and how do you become one? MFPs complete extensive training: usually spending around 40 hours in the classroom, studying assigned reading materials, and participating in hands-on training. The focus is food safety and food preserving methods. To be certified, an MFP must pass a written exam and commit to a number of volunteer hours in the community.

An MFP’s mission is then to help educate the public in a variety of ways, under the supervision of their Country Extension Office. To become an MFP, you need to learn about your local County Extension program, sign up, and likely pay a small fee for materials.

What are the qualities of a good MFP? Good MFPs: (1) have more than a passing interest in food safety and food preservation; (2) have the desire and time to volunteer for community service; (3) are curious, analytical, and personable; (4) like to teach and can communicate well; (5) have a passion for food preservation, people and fun!

Becoming an MFP means joining a community of like-minded individuals, both men and women. If you’re interested, there’s no time like the present!


If you have any interest in becoming a Master Food Preserver, contact your local Extension Service for details. It is so rewarding!

Friday, July 18, 2014

Summer Squash Casserole

Summer is here and my zucchini are going crazy.  Last year I got one. Seriously, I had to BUY them from the fruit stand.  What do you do with all of them when you've exhausted yourself with the standard zucchini recipes....bread, fried, etc.  I googled a casserole recipe that came from Paula Deen.  It was quite a bit different from the casserole I have had before that has cream of chicken soup and stuffing mix.  That recipe is really good as well, but I was looking for a little bit lighter version and this is it!

Squash Casserole ala Paula Deen
6 cups sliced zucchini and yellow squash
1 diced onion
4 T. butter
1/2 c. sour cream
1 c. cheddar cheese, shredded
1 c. Ritz cracker crumbs
Slice up your squash and put it in a frying pan with some oil. Cook until the squash is super soft, about 20 minutes over medium heat.  Pour into a colander and drain the liquid off. Cook onions in the butter until soft and a little brown. Combine the squash, cooked onions, sour cream and cheese together, salt and pepper to taste, and pour into a casserole dish. Cover the top with the Ritz cracker crumbs. Bake in a 350 degree oven for about 30 minutes.

So good!

Tuesday, July 15, 2014

Keep Calm and Eat Jam!

One of the best things about summer is jam.  Can there be anything more delicious than a piece of toast dripping with butter and homemade jam.....of any persuasion?  I think my personal favorite is apricot....or plum. Although, marionberry-raspberry won me an award a few years back from a magazine!  Those were the days!  

As a Master Food Preserver, one of the things we teach is HOW to preserve food. There has been a flood of interest the last few years in canning and preserving fruits and vegetables because families want to be in control of what goes in to the food they are eating, putting food in the pantry for use later in the year, and having delicious food in jars!  It's fantastic!


One of the easiest ways to preserve fruit is making jam.  What is jam? Crushed fruit with added sugar cooked to a spreadable consistency.  Some recipes call for pectin, a thickening agent made from citrus peels. You can also make jam without pectin or make it with a low-sugar pectin.  I prefer the recipe using regular, powdered pectin and cooking the jam. Some people prefer to make freezer jam because it requires no water-bath processing. It also has a "fresher" taste.  Your choice....both are equally delicious!  MCP is my preferred brand of pectin. (Sure-jell and MCP are both owned by Kraft Foods.)  


You can also use a brand of pectin called Pomona Pectin.
From their website. 
  • Sugar-free, preservative-free, low-methoxyl citrus pectin.
  • Sweeten jam & jelly to your taste with low amounts of any sweetener: sugar, honey, agave, maple syrup, frozen juice concentrate, stevia, xylitol, Sucanat, concentrated fruit sweetener, or Splenda and other artificial sweeteners.
  • Each 1 oz box makes 2 to 4 batches (about 5 – 8 oz jars per batch).Recipes can be doubled or tripled. Each box contains pectin powder, calcium powder, directions, and recipes.
  • Keeps indefinitely.
  • Kosher manufactured. Vegan. Gluten Free. Non-GMO.
  • Celebrating 34 years of low-sweetener jam and jelly.
The only negative that I have experienced with Pomona Pectin is that within the year my jam was not very pretty anymore. Sugar preserves the color of preserved food....low-sugar products lose their color quicker than a full-sugar jam or jelly would.  My kids won't eat the "weird" colored jam so it will get wasted. No bueno!

So...jump in with both feet! Get your kids in the kitchen to help! Make some JAM!
Here is my Grit Magazine Canning Contest Winning Recipe:
Marionberry Raspberry Jam
Shelley Bloemke
2 1/2 cups raspberries
2 1/2 cups marionberries or blackberries
1 box MCP Pectin
Measure 7 cups of sugar into a bowl 

Crush the berries with a potato masher. Place in a 6-8 quart saucepan. Add 1 box of MCP pectin, stir to incorporate. Bring to a rolling boil on high heat and add the sugar. Return to a full, rolling boil and cook for 4 minutes.
Ladle into prepared jars, leaving 1/8 inch headspace at the top of the jar. Wipe the rim of jar and place lid and ring on.  Screw rings on and place in water-bath canner. Water must be 1-2 inches above th jar. Cover, bring to a gentle boil. Process  jam for 10 minutes. Adjust processing time according to your altitude . Remove jars and place upright on a towel. Let cool, without disturbing jars for 24 hours, making sure jars have sealed by pressing the center of each lid. If the lid springs back, the jar isn't sealed and needs to be refrigerated. 
Remove rings and keep un-opened jars in a cool, dark place  for up to 1 year. Opened jars will keep for 3-4 weeks in the refrigerator.  

Please remember....it is super-duper important to process your home-canned jams.  It will help prevent spoilage from mold and bacteria.  DON"T do the "turn the jar upside down to seal like my Mom did" method of processing. After all the work you put in, you don't want to throw out your jam because of a bunch of mold. YUCK!

For more canning information the National Center for Home Food Preservation is THE resource I rely on for the most current canning guidelines.  

Happy Jamming! BTW...I won a wheat grinder from the canning contest!

Monday, June 3, 2013

Rhubarb Bliss

Yum!
My name is Shelley and I love rhubarb. In any form....sweet and savory.  Why do I love it? Rhubarb's ability to "BE" in a recipe. It can be tart or sweet depending on what you do to it.  I saw this recipe on  FB.  And yes, I will give you the origin....it is
 www.facebook.com/groups/weightnomorewithsara/ .  I always give the origin...it's the right thing to do.

Now back to the recipe!  I love a good "DUMP" cake.  I especially love how they work in a dutch oven.  Fruit or pie filling, cake mix, water or soda, and a little butter make this fantastic little cake that is easy for even a Boy Scout to master. (My husband is involved in Scouting and they always make this for dessert.)  This recipe has elevated the "DUMP" cake to red, rhubarb goodness.

Rhubarb Dump Cake
4 cups rhubarb, chopped into 1/4 inch dice.
1 c. sugar
1 3-ounce pkg. strawberry jello
1 yellow cake mix
1 c. water or clear soda, like 7-Up
1/4 c. butter, melted
Preheat oven to 350 degrees. Grease a 9x13 pan and put in the rhubarb. Sprinkle the sugar on evenly, and then the jello. Next add the dry cake mix over the other layers. Pour the water or soda on the top followed by the melted butter.
Bake in the pre-heated oven for 40-45 minutes or until golden brown.
Delicious warm or cold! Ice cream would be fab with this as well.